Grinding and Testing of Telescope Mirrors – Part 2
Tech info | July 12, 2022
Grinding
The most used material for optical mirror making is glass. It is cheap and relatively easy to process. It allows the production of high-quality optical surfaces. In addition, it is a rigid material resistant to scratches. But the most valuable is its stability over time. It retains its properties for centuries without change. Sorts with a low value of thermal expansion coefficient are suitable. Such are borosilicate glass and crystalline glass-ceramic (Sitall, Zerodur). When selecting the glass workpiece, the thickness-to-diameter ratio is of primary importance. The mechanical deformation during the manufacturing and later when the mirror is mounted in the telescope depends on this. The thinner the workpiece is, the bigger the number of supporting points should be [1][3].
In brief, glass processing is grinding its surface using an abrasive-water mixture of hard abrasive powder with particular grain size and water. The process begins with roughly digging the glass disc to give it the shape of a concave sphere. A coarse-grained abrasive is used with the help of a small metal ring grinder [3][4]. The shape of the resulting gouge is controlled by a precision micrometric depth gauge with an accuracy of 0.01 mm and higher.

The abrasive grain size is measured in microns (µm) or mesh. The last is an imperial unit and dates back centuries ago. Meshes are the number of holes in a sieve measuring one square inch (25.4 x 25.4 mm). The smaller the holes, the higher the number of meshes. For example, the sandpaper sizes are still indicated in meshes. In the past, a sieve was a textile fabric woven from threads of a certain thickness and served to sift flour or other powdery products. Abrasives are produced in the form of powder with a particular grain size. Hard carbides and oxides such as corundum (Al2O3), carborundum (SiC), boron carbide (B4C), silica (SiO2), etc., are used.
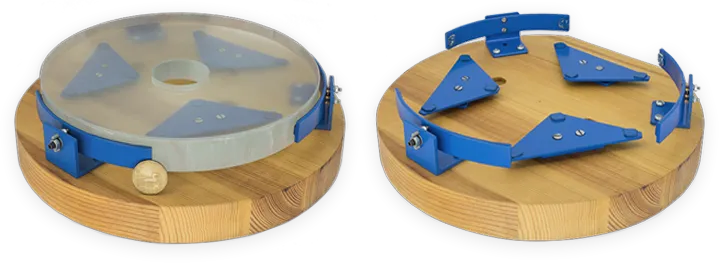
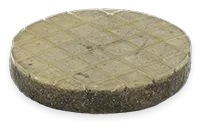
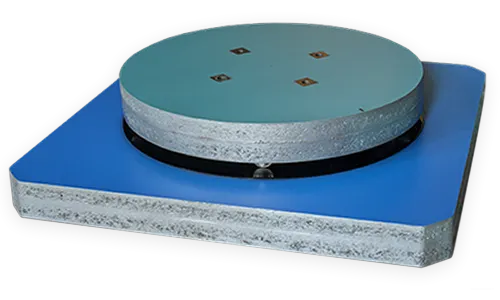
After the initial rubbing of the glass has been finished and an approximately spherical shape is achieved, the gradual smoothing of the surface begins with abrasives with gradually decreasing sizes. At this stage, grinding continues with a special grinder. It is a plano-convex cement casting with the curvature of the convex side corresponding to the curvature of the concave glass disc. After the cement has hardened and dried, the entire grinder is covered with epoxy resin. On the convex side, small squares of polymer material are arranged, taking care that the center of the resulting square grid does not coincide with the center of the grinder. This is done to avoid zonal errors so that the optical surface is rotationally symmetric and has the same curvature everywhere. The discrete square grid has some general advantages. First, in the resulting system of grooves between the squares, the abrasive-water mixture circulates freely, and the grinding is much more uniform. Second, if a large-sized solid particle accidentally falls between the surfaces, it quickly rolls out into the nearest ditch and cannot scratch the glass. Third, using a softer polymer material for the grinder surface achieves much fine matte finish on the glass. The most preferred material for the squares is organic glass (plexiglas), but any other similar polymer can be used.
The process of grinding the glass continues in several repeating steps, with each subsequent one using an increasingly fine abrasive grain [2][3][4]. A given step ends when the micro-roughnesses from the previous one entirely disappear. Between the individual steps, the grinder and mirror are washed very carefully, and the quality of the surface is checked with a strong magnifying glass. The movements of the grinding tool relative to the mirror are smooth and oval, with mutual rotation of the two rubbing surfaces towards each other. They can be done by hand or by machine. The initial grinding begins with a grain size of 300 – 400 µm, and at each subsequent step, the size of the grains decreases 1.5 – 2 times. Grinding completes when grain size reaches 14 µm or even 10 µm. Further reduction is not desirable, as the probability of dust particles getting between the rubbing surfaces and making deep scratches is very high. When this happens, the process goes back to the rough grinding stage, and all procedure starts from the beginning. Therefore, in the final stages of fine processing, the cleanliness of everything must be superior!
During the grinding stage, the side and back surfaces of the mirror should be processed too. It is done not only for decorative purposes but also to eliminate the surface stresses obtained during the casting of the glass workpiece.
When the fine grinding finishes, the next stage of the processing begins – polishing the surface.
Read more details about mirror polishing and figuring in the next part of our series. Learn about the accuracy of optical surfaces.
Reference
- Максутов Д.
Изготовление и исследование астрономической оптики
, Наука, 1984. - Навашин М.
Телескоп астронома-любителя
, Наука, 1979. - Наумов Д.
Изготовления оптики для любительских телескопов-рефлекторов и ее контроль
, Наука, 1988. - Сикорук Л.
Телескопы для любителей астрономии
, Наука, 1982.